7.07.2013

31 Day (Week) Challenge - Day 21: Inspired by a Color

Hello everyone!

I'm sorry for the late post again! It's going to take me a while to get back into my schedule because I have so many events to go to these next few weeks. Birthdays, anniversaries, weddings, and so much more!

But here I have for you the next post for the 31DC! Today's post is "Inspired by a Color" and I kept thinking of way too many things for various colors. So instead, I decided to be "inspired by" the name of one of my polishes. I ended up getting inspired by two of them: Revlon Kiss Me Coral and Revlon Plum Seduction.. The two polish names just work so well together that I decided to use them both for my mani. However, the combined colors made it extremely difficult to get a good picture so I apologize for the horrible pictures.


To get this look:
  • I started off by applying my base coat and then applied three coats of Revlon Kiss Me Coral
  • To make the kisses, I used a dotting tool and Revlon Plum Seduction and dotted on the kisses.
  • The kisses needed to look like they were put there by someone kissing the area, so to get that look, I used a striping brush and striped on some of the Revlon Kiss Me Coral. I think that's the reason the plum polish didn't pop out as much. Before the striping, the kisses were more noticeable.
  • I ended the mani with my favorite top coat.

Even though the pictures didn't turn out so great, I think the mani looks great in real life. The plum kisses are more noticeable than the pictures show so you can definitely see them; they don't blend in with the background.

Let me know what you think of this and if you think my interpretation of the challenge was alright. I hope you all like it!!

7.02.2013

31 Day (Week) Challenge - Day 20: Water Marble

Hi everyone!!

I'm back!!! Got back last week but there have been so many events that I have had to go to and things to catch up on so I haven't been able to post on here. I promise I will catch up soon!

I'll put up a few pictures of my trip as soon as I can (hopefully this week).

Anyways, back to the point of the post! Last week's challenge was water marbling. It took a long time for me to decide on what color theme I wanted but I eventually went with blue; something that looks like water. Take a look at my attempt and tell me what you think about it!


To get this look:
  • After putting on my base coat, I put on one coat of Sinful Colors Snow Me White to use as my base polish.
  • For the water marbling, I used Sinful Colors Snow Me White, Revlon Plunge Pool, Revlon Midnight Haze, and Revlon Downtown. I used a toothpick to swirl the patterns for each nail.
  • I sealed the deal with my trusty top coat.
  

I absolutely love how my middle finger turned out! And of course that was the first nail that I did so obviously I couldn't recreate something even close to that for the other nails...womp womp. But I do like how all of them turned out! There wasn't a single nail that I had to redo because of being disappointed with it or it just messing up completely. Yay!


 I hope you all like it!! I sure do :) But still, I would love to hear what you think of my water marbling! Let me know in the comments section below. Or if there is a color scheme you would like for me to try out or some type of...well, anything! Just let me know below. I try to respond back to everyone.

As I said above, I will try to get a few pictures up from my vacation (although picking a few is going to be very hard because I have over 1000 pictures). But I'll try! I hope you all have a great Tuesday!


6.06.2013

31 Day (Week) Challenge - Day 19: Galaxies

Hi everyone!

I have the next 31DC post for you and I was able to make this one because I had to do something with my nails for my trip anyways! And what a better mani to have for a cruise to Alaska! I thought that the galaxies mani could somewhat represent the northern lights as well, so it sort of goes, right?

Anyways, this is going to be a quick post because I need to head out to the airport soon! Take a look at my attempt.


To get this look:
  • After applying a trusty base coat, I applied one coat of Sinful Colors Snow Me White because I don't like applying black polish directly to my nails. 
  • I followed the white with two coats of Sinful Colors Black On Black.
  • Then I used a sponge to sponge on blue polish (Revlon Plunge Pool), lavender polish (Revlon Enchanting), bright pink polish (Revlon Colorstay Wild Strawberry), and yellow polish (Revlon Sunshine Sparkle). After all of that, I went back and added a little bit more of the blue polish.
  • I also sponged on some Orly Space Cadet because, well, it has the word "space" in it. I had to use it! Plus the multichrome glitter particles went with the whole look perfectly.
  • I also added some silver glitter by applying one coat of Sally Hansen Hard As Nails Ice Queen.
  • I sealed everything with a top coat.

This was super easy to create and I love how it turned out! I even did the galaxies on my big toes so I'm totally galaxy-fied!


I've seen other bloggers add white dots to this type of mani too and I tried that out on my toes (I did my toes before my fingers) and I didn't like how it looked on me. Maybe I should have tried to use a light grey instead of white? Who knows. But I like the effect the glitter brings to this look.


Well, there you have it! What do you all think of this? Let me know!! This is my very first attempt at galaxy nails. I've tried sponging in a similar way before but the mani wasn't actually a galaxy mani. So hopefully you all think my first attempt was alright!

I hope you all have an amazing couple of weeks and I'll see you all once I get back!


6.04.2013

Update!

Hi everyone!

I have a couple of updates for you regarding the next few weeks. I'm going on a vacation to Alaska this Thursday with my family so I will not be able to post any manicures for a few weeks. The 31DC manicures that I will be missing are the galaxies and water marble. However, if I get a chance to create one of those before this Thursday, I will post it! But I think that is highly unlikely because I haven't even started packing yet :( I still need to create a mani to wear on vacation!! If you have any ideas for me, let me know!

Alaska!! I'm super excited!! I've planned to go dog sledding, hike up a glacier, see the northern lights, and so much more! I'll definitely post a few pictures on here after I come back. Also, if I don't end up posting anything before I leave, I promise to have something for you by June 24 (latest). I'll be back a few days before that but that should give me enough time to settle back into my routine. This also means that I will be missing the Tri-Polish Challenge for June! June's colors are super pretty too (red, pink, and purple). Oh well, I still have July!

I hope you all have an amazing few weeks and I'll get back to you once I'm back home!


6.03.2013

31 Day (Week) Challenge - Day 18: Half Moons

Hey guys!

This post is going to be pretty short because it's super late, I just got back from my brother's high school graduation, and I'm too tired to function! I have the next post in the 31 Day Challenge for you: half moons! My original idea was completely different but I didn't have enough time to create it since I had to go to my brother's graduation today. So, I opted for something much simpler.


To get this look:
  • After applying a base coat, I put hole reinforcements stickers on my nail (on the lunula) and then applied two coats of Revlon Teak Rose.
  • When that was dry, I peeled off the stickers and then filled in the half moons with Revlon Colorstay Bare Bones using a small brush.
  • Using a striping brush, I created the three lines with Revlon Totally Toffee.
  • To finish off the look, I used a dotting tool to add dots with Revlon Colorstay Bare Bones and Revlon Totally Toffee.
  • I ended it all with my trusted top coat.

I liked the end result. It was simple enough but still cute! Also, it is a little sloppy because I was in such a rush to get it done. I hope you all still liked it! And now I am off to bed!! Check back tomorrow because I will have some updates about my blog for you all!


5.30.2013

Tri-Polish Challenge (May #4) - Layer It Up

Hello hello!

Today is the last post for May's TPC, can you believe it? May seems to have flown by!

Sorry for the late post. I decided to go see Star Trek, finally, and just got home! It's a good thing I had the pictures ready, otherwise I don't think I would have been able to put it up until later tomorrow. (In case any of you are wondering, Star Trek was really good!)

To refresh, the colors for May are Red, Grey, and Blue.

For today's mani, I decided to use all three polishes and just layer them, but so that you can see all three colors. Take a look!


To get this look:
  • I first applied my base coat and then applied three coats of Revlon Coast is Clear because it is a very sheer polish, but I applied most of the polish over the lunula and a little down the sides.
  • I then applied one coat of Revlon Midnight Haze in the same shape of my nail, but a little down the nail so that the blue polish was still visible.
  • Using two coats of Revlon Revlon Red, I created the same shape over the grey but a little more down so that the grey was still visible behind the red polish. 
  • I sealed everything up with my favorite top coat.

I actually love how this turned out! It is much better than I was expecting. The best part about this mani is that it is super easy! And if creating the rounded tops are hard to do with the regular brush, I think using a detail brush to create the outline would help. Either way, this mani is super simple but fun. Plus, I love how the whole look makes each color pop!


What do you all think of my last TPC mani for May? Let me know below! If you want to see some more great looks, check out the ones the other challengers have created below.

I have a busy weekend ahead of me so I am not sure if I'll be able to post anything this weekend. If I do, then I do. But if not, check back on Monday to see my next 31DC post!


5.28.2013

Tri-Polish Challenge (May #3) - Tie-Dye Explosion

Hello everyone!

Today is the third TPC post for May! These TPC posts finish so quickly; I can't believe that there is only one more post left for May! And even though May is almost over, Chicago can't seem to get its weather in check. Oh well...

Remember, the colors for May are Red, Grey, and Blue.

For today's post, I decided to use a drag marbling technique. I found an awesome tutorial by Brie from Lacquerheads of Oz. Take a look at how my attempt turned out!


To get this look:
  • The tutorial says to use white as a base polish to create the look but I tried to do this several times with a white base polish and even if it was completely dry, I ended up peeling it over when I was dragging the other polishes.
  • I worked with one nail at a time and first put a long red blob using Revlon Revlon Red on my nail, followed my a long grey blob using Revlon Midnight Haze, and then ended with putting a small blue blob using Revlon Coast is Clear. I put the blue last because it's a very thin polish and whenever I put it first, the red would end up mixing in with it and would overtake the blue.
  • Then I used a toothpick (you can use a needle or any other pointy tool you may have) to drag the polish outwards (from the blue polish blob to the grey polish blob). 
  • To get rid of the bumps and ridges, I added my favorite top coat.

It's the not as clean as Brie's tie-dye design but I think with some practice, I'll get used to this. I only got this end result after trying this out about 7 times on one of my nails, and I still ended up having to redo my middle nail three times after the other nails were done.


I think it turned out quite nice for a first attempt, don't you think? Have any of you ever tried the drag marbling technique? There are several other designs you can make with this aside from the tie-dye look.

I also love how the blue gives the whole look a nice pop! The pinky nail, to me, turned out the best, which is odd because usually I am the most disappointed with my pinky nail. Take a look at my pinky in the first picture I posted and the next picture.


Clean up was really hard. I should have used tape around my nails but I thought that it wouldn't get that bad. Clearly, I was so wrong and the nail polish decided to get back at me for not listening to the tutorial! I was also surprised at how hard this was for me considering the drag technique with a single polish blob is not hard at all. I even made a tutorial for that! Practice makes perfect, huh? I'll definitely keep trying!

Anyways, let me know what you think of this! Also, don't forget to check out the other great manicures from today! Check back on Thursday for the last TPC post for May.


5.27.2013

31 Day (Week) Challenge - Day 17: Glitter

Hi guys!

Today, I have for you the next post in the 31 Day Challenge: Glitter manicure! I had a hard time thinking of something to do for this one so I decided to go find some inspiration. Kayla from Nails by Kayla Shevonne is my absolute favorite nail blogger so I went through her blog and found this! The whole manicure looked like so much fun so I knew that I had to try it out! My challenge mani for today is inspired by her Mish Mash Mint Mani.


To get this look:
  • After applying a base coat, I applied two coats of Sinful Colors Timbleberry to use as my base polish color on all of my nails. It's such a pretty coral!
  • Pointer: I used a dotting tool and Sinful Colors In The Spotlight to apply glitter dots randomly on my nail. I then used a small detail brush to outline the dots with Sinful Colors Black On Black.
  • Middle: Using a small detail brush and Sinful Colors Black On Black, I made a drippy outline. Then I filled in the drips with Sinful Colors In The Spotlight using my detail brush.
  • Ring: I used my detail brush to add a rectangular section of glitter to the side of my nail with Sinful Colors In The Spotlight. Then, using my small detail brush, I added the black outline and random black lines to the non-glitter area.
  • Pinky: With Sinful Colors Black On Black and a small detail brush, I painted a triangle and the triangular lines. Then I filled in the gaps with Sinful Colors In The Spotlight using a detail brush.
  • I smoothed everything out by applying my favorite top coat.


I think my drippy nail would have better if I made the drips using the glitter first and then outlining it. But what's done is done! I also don't like my pinky nail. Oh well. Out of all the nails, I think the pointer finger nail turned out the best with the leopard print!

However, all together, I do like this mani! I think it's fun and it's definitely something that would be fun to wear over the summer. What do you think?


I think the glitter went well with the coral polish as well. So that's always a plus!

Let me know what you think of this! I would love to get some feedback/tips form you.

Make sure you check out my friend's 31DC mani at My Life In Turquoise.

I have several great ideas for next week's 31DC mani so make sure you tune in next Monday! But before that, I have the 3rd post for you for May's Tri-Polish Challenge tomorrow. There's a cool technique that I saw that I want to try out for it.

That's 17 down and 14 more to go!


5.23.2013

Tri-Polish Challenge (May #2) - Put Me Together

Hello hello!

Sorry for being a little late on this post (it's only 20 minutes late!!). I had guests over at my house all day and then had to go to an awards ceremony for my brother at his high school. It was a fun, busy day!

To recap, the colors for May are Red, Grey, and Blue.

I didn't have much time to create my manicure so I went with something that was super simple to create but cute at the same time. I've seen this kind of manicure around on many different blogs so I can't really put up a direct link for where I got my inspiration from. Anyways, check out what I have for you today!


To get this look:
  • I started off with using Sinful Colors Snow Me White as my base polish color (after applying a base coat, of course).
  • Using a detail brush and Revlon Revlon Red, Revlon Midnight Haze, and Revlon Coast is Clear, I created colored squares/blocks.
  • After letting the blocks/squares dry completely, I used a large-sized dotting tool and all of the polishes to add dots in between each of the blocks, creating puzzle pieces that fit together.
  • I sealed it all with my favorite top coat!

Before I go further, I want to apologize for the horrible pictures! I was in such a rush because we were getting late for the awards ceremony so I quickly took the pictures and ran out the door.

This manicure was probably one of the easiest ones I've ever created. There's really nothing to it because the squares don't have to be perfect and the dots don't necessarily have to be perfect either. As long as the dots overlap the squares, you're good to go! If any of you want me to make a tutorial for this, let me know in the comments section below so I can add it to my list of things to take care of ASAP!


What do you all think of my puzzle pieces attempt? I really like it! It's cute, fun, and ended up being a conversation starter for me at my brother's high school because of the bright, bold colors!

I've seen this manicure created with actual color themes, such as shades of colors, pastels, warm colors, etc. That's why I was a bit hesitant at first to do this, since it has no real color theme (aside from being nautical colors). But I think the colors worked well together! What do you all think? Let me know below!

Make sure you check out the other great looks for the 2nd TPC post. And be sure to check back on Monday for the next 31 Day Challenge post! I have a great idea and I'm very excited to try it out and show you how it ends up looking!


5.21.2013

Tri-Polish Challenge (May #1) - Ikat Print

Hey guys!

The Crumpet'sTri-Polish Challenge is back for the month of May! I have the first post for that challenge for you today. But first, let me go over the rules again:

Rules:
  • Crumpet's Nail Tarts will be choosing three colors each month and you must ONLY use those three colors to create the manicures
    • The colors for May are Grey, Red, & Blue
  • That being said, you have free use of white, black, silver, gold, and glitter toppers
  • You must choose 1 polish to represent each color choice and use the same three polishes throughout the challenge
  • The challenge has 4 posts each month: the Tuesday and Thursday of the 3rd and 4th week of each month 
    • For May: 21, 23, 28, 30
 The brands/colors that I ended up choosing are:

Revlon Midnight Haze, Revlon Revlon Red, Revlon Coast is Clear
Revlon Midnight Haze is a metallic shimmery grey, Revlon Revlon Red is a bright red creme, and Revlon Coast is Clear is a light shimmery tiffany blue.

Now onto the good stuff! I decided to do ikat print for the first day of the challenge because I really wanted to do it in April but ended up not doing it. I also love how ikat looks and how the manicures for it end up turning out! Take a look at it.


 To get this look:
  • I wanted to have a lighter base color so after applying my base coat, I used Revlon Coast is Clear as my base polish color.
  • I then used Sinful Colors Snow Me White and a small detail brush to create white triangles on all of my nails.
  • After the white had dried, I used Revlon Revlon Red to create a smaller, red triangle within the white triangles.
  • Normally, the next step would use black polish, but since this is the first manicure for May's Tri-Polish Challenge, I wanted to use all three polishes. I used Revlon Midnight Haze to imperfectly outline the white triangles and then add a smaller triangle within all of the red triangles.
  • I sealed the deal with my favorite top coat.


I absolutely love how it turned out! It's a cleaner version of the ikat because it is really supposed to be a little more rough looking (to compare, take a look at my other ikat print manicure) but I still like it.

What do you all think of it? Let me know in the comments section below!

Take a look at the other great manicures for the first post in the Tri-Polish Challenge!


5.20.2013

31 Day (Week) Challenge - Day 16: Tribal Print

Hi guys!

I have the next manicure for the 31 Day Challenge for you. I think it looks fun and well...my brother said that it reminded him of the rugs that were in our hotel in Guatemala because of the print that I used. He's a little...odd? But in reality, they really do resemble them!

Anyways, let's get to the good stuff! This manicure was super fun to create and I now know that I love tribal print!


To get this look:
  • I used Revlon Colorstay Bare Bones as the base polish on all of my nails and then decided to create the print over it.
  • I used a small detail brush, thinnest striping brush, and dotting tools in various sizes, along with Revlon Lagoon Afternoon, Maybelline Color Show Orange Fix, and Sinful Colors Black On Black to create the various prints that you see.
  • I sealed everything with my favorite top coat!

Coincidentally, my manicure ended up matching my outfit because I wore a nude colored dress. I love when things work out like that, don't you?

I hope you all liked my attempt at a tribal print manicure. This was my first real attempt at a tribal manicure (I had doodled on my nails in India and it ended up having a tribal-esque feel to it and my 2nd manicure for April's Tri-Polish Challenge mani had a tribal-esque quality to it). What do you think of it? I know that I need some work to make things a bit more even and cleaner, but I'm still happy considering it is my first attempt.

If you have any tips or suggestions, please let me know in the comments section below!

And as always, check out my friend's mani at My Life In Turquoise.

Now, that's 16 down and 15 more to go!! We're more than half way through this. No turning back now!

A quick word: My thoughts and prayers are with all of the families affected by the tornado in Oklahoma. It's devastating news but the heroic actions of the first response team lessened the blow. Stay strong, Oklahoma!

5.19.2013

Weekly Challenge - Cocktail: "Shaken, Not Stirred"

Hi everyone!

Today is the last day for cocktail week! Something that I always think of when I hear the word "cocktail" is James Bond. Therefore, today's mani is inspired by 007! Two aspects of James Bond in particular served as my inspiration for this manicure:

http://scifipulse.net/wp-content/uploads/2012/11/Bond_gunbarrel.jpg / http://0.tqn.com/d/cocktails/1/I/5/L/-/-/94116773_9.jpg
The first is the shot (no pun intended) of James Bond through a gun barrel and the second is the Vesper Martini, which James Bond always orders "shaken, not stirred" and claims to have created.

It's a rag tag mani but I think it works together just because I believe the main aspects of Bond were captured.


To get this look:
  • Thumb: I tried to create the gun barrel by using Revlon Silver Screen as the base polish and Sally Hansen Nail Art Pen Black for the swirls. I also used Sinful Colors Snow Me White to make a white hole in the middle to show the open end of the barrel (the thumb was a bit of a fail; I tried to create a gun pointing back to towards the barrel, but I couldn't figure out how to do it in that small of a space).
  • Pointer: The logo of James Bond "007" has to be in a JB mani! I used Revlon Top Speed Golden as the base polish and then used Sally Hansen Nail Art Pen Black to write 007. I had to add some "bling," aka glitter, so I used Sally Hansen Gem Crush Lady Luck.
  • Middle: James Bond is always in a tux or a nice suit so I had to include that! I made the tuxedo using Sinful Colors Snow Me White and Sinful Colors Black On Black.
  • Ring: The Vesper Martini! This is where the cocktail part of this challenge comes in. I used Revlon Top Speed Varnished as the base polish and then created the martini using Revlon Silver Screen and Sally Hansen Nail Art Pen Black. I tried to make the glass look frosted so I did that using Essie Matte About You and then I used Sally Hansen Nail Art Pen Yellow to make the hanging lemon peel. Again, I added some glitter from Sally Hansen Gem Crush Lady Luck to have a light, blingy effect.
  • Pinky: What's 007 without his women, right? I added a strapless red dress to finish off the look. Revlon Top Speed Golden was used as the base polish once again and then the dress was made using Zoya Sarah
**I used a small detail brush and a dotting tool to make this mani**


I'm pretty pleased with this mani! It took a long time just because there were so many different polishes that were used and there was something a lot going on on each nail. Do any of you think of 007 when you think of drinks/cocktails? It's so classic for me!


Let me know if you all like it! I hope that you do. It was a little hard for me to make the mani because my nails are super narrow. I try to keep them a little longer to compensate; I need more room so I keep them longer since my nails are not wide at all. But I try! It definitely is a challenge trying to fit everything onto a skinny little section but it's not impossible.

Hopefully you all like it and if you want to take a look at my other cocktail challenge mani from this week, you can do so here.

Take a look at the manicures the other challengers created for this week below!

Now, I'm finally off to bed! I love the warm weather but my allergies have finally kicked in and they're definitely winning this war. Allergies: 1 | Ruthvi: 0   :(

Check back tomorrow for the next 31 Day Challenge post. Good night, everyone!


5.17.2013

Nail Art Tutorial: Splatter

Hi everyone!!

I made my very first nail art tutorial today! The tutorial is for the splatter manicure that I created for Day 4 of April's Tri-Polish Challenge. I'm very excited to show it to all of you and I hope it helps!! If there is anything that I missed or if you would like me to include another step in future tutorials, please let me know in the comments section below.

To refresh, here's the manicure that I created for the Tri-Polish Challenge:


To get the look, you'll need:
The exact names of what I used are in parentheses, but you can use whichever brands/colors you prefer.

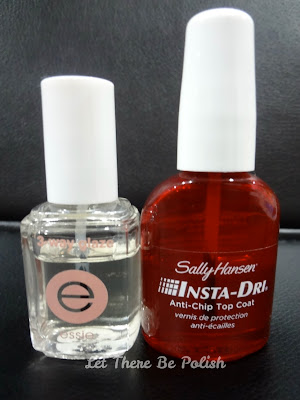
Base coat (Essie 3 Way Glaze) and top coat (Sally Hansen Insta-Dri Top Coat)
 

A toothpick/small-sized dotting tool/orange stick

White polish (Sinful Colors Snow Me White)

*Cream polishes work best*
**You can use any combination of colors*
Purple polish (Sinful Colors Amethyst), pinky coral polish (Sinful Colors Timbleberry), green polish (Sinful Colors Irish Green)

Now, onto the tutorial!


I hope this tutorial was helpful! And as I stated before, if any of you believe that I missed a step, or believe that I should explain something more clearly, let me know in the comments section below. Also, if you try out my tutorial, I would love to see pictures! Leave me a link in the comments section!