Showing posts with label Matte. Show all posts

5.19.2013

Weekly Challenge - Cocktail: "Shaken, Not Stirred"

Hi everyone!

Today is the last day for cocktail week! Something that I always think of when I hear the word "cocktail" is James Bond. Therefore, today's mani is inspired by 007! Two aspects of James Bond in particular served as my inspiration for this manicure:
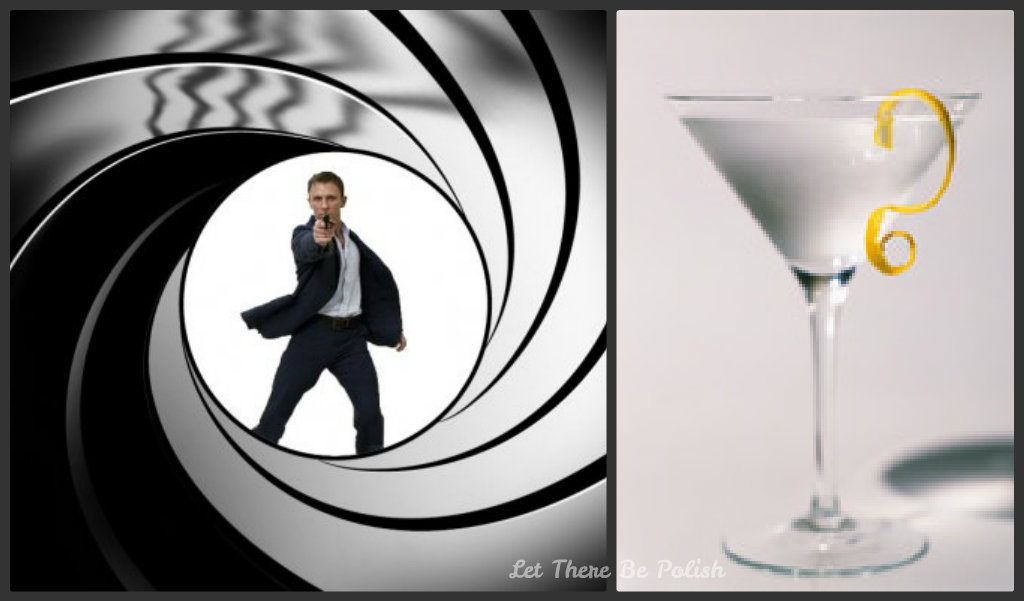
http://scifipulse.net/wp-content/uploads/2012/11/Bond_gunbarrel.jpg / http://0.tqn.com/d/cocktails/1/I/5/L/-/-/94116773_9.jpg
The first is the shot (no pun intended) of James Bond through a gun barrel and the second is the Vesper Martini, which James Bond always orders "shaken, not stirred" and claims to have created.

It's a rag tag mani but I think it works together just because I believe the main aspects of Bond were captured.


To get this look:
  • Thumb: I tried to create the gun barrel by using Revlon Silver Screen as the base polish and Sally Hansen Nail Art Pen Black for the swirls. I also used Sinful Colors Snow Me White to make a white hole in the middle to show the open end of the barrel (the thumb was a bit of a fail; I tried to create a gun pointing back to towards the barrel, but I couldn't figure out how to do it in that small of a space).
  • Pointer: The logo of James Bond "007" has to be in a JB mani! I used Revlon Top Speed Golden as the base polish and then used Sally Hansen Nail Art Pen Black to write 007. I had to add some "bling," aka glitter, so I used Sally Hansen Gem Crush Lady Luck.
  • Middle: James Bond is always in a tux or a nice suit so I had to include that! I made the tuxedo using Sinful Colors Snow Me White and Sinful Colors Black On Black.
  • Ring: The Vesper Martini! This is where the cocktail part of this challenge comes in. I used Revlon Top Speed Varnished as the base polish and then created the martini using Revlon Silver Screen and Sally Hansen Nail Art Pen Black. I tried to make the glass look frosted so I did that using Essie Matte About You and then I used Sally Hansen Nail Art Pen Yellow to make the hanging lemon peel. Again, I added some glitter from Sally Hansen Gem Crush Lady Luck to have a light, blingy effect.
  • Pinky: What's 007 without his women, right? I added a strapless red dress to finish off the look. Revlon Top Speed Golden was used as the base polish once again and then the dress was made using Zoya Sarah
**I used a small detail brush and a dotting tool to make this mani**


I'm pretty pleased with this mani! It took a long time just because there were so many different polishes that were used and there was something a lot going on on each nail. Do any of you think of 007 when you think of drinks/cocktails? It's so classic for me!


Let me know if you all like it! I hope that you do. It was a little hard for me to make the mani because my nails are super narrow. I try to keep them a little longer to compensate; I need more room so I keep them longer since my nails are not wide at all. But I try! It definitely is a challenge trying to fit everything onto a skinny little section but it's not impossible.

Hopefully you all like it and if you want to take a look at my other cocktail challenge mani from this week, you can do so here.

Take a look at the manicures the other challengers created for this week below!

Now, I'm finally off to bed! I love the warm weather but my allergies have finally kicked in and they're definitely winning this war. Allergies: 1 | Ruthvi: 0   :(

Check back tomorrow for the next 31 Day Challenge post. Good night, everyone!


5.15.2013

Weekly Challenge - Cocktails: Strawberry Peach Margaritas!!

Hi everyone!

I'm participating in weekly challenges by Laura. This week's theme is cocktails! What better theme could go along with the beautiful summer weather we've been having here in Chicago?

My favorite summer cocktail/drink is a frozen margarita, specifically, a strawberry, peach, or mango margarita! I chose to create a combo, strawberry and peach, frozen margarita. I got my inspiration from this picture:


www.barmano.com

Frozen margaritas usually have that frosty look to them and when they've been sitting for a little while, you can see the condensation on the glasses. That's what I tried to create with my mani: condensation on a frosty margarita glass!


To get this look:
  • I started off with a base color coat of Revlon Mai Tai Ask? (perfect choice because even the name is cocktail-inspired!).
  • The random gradient was created using Revlon Mai Tai Ask? and Revlon Colorstay Wild Strawberry (also perfect because I was going for a strawberry margarita and this one has strawberries in the name!).
  • I then used Essie Matte About You to create the frosted look.
  • A small sized dotting tool and Revlon Quick Dry Top Coat to add the condensation dots and drops.

What do you all think of my attempt?? I'm definitely in the mood for margaritas now!!

Check out the other great cocktail-inspired manis the other challengers have created below! The theme lasts until Saturday evening so I'm sure we'll be seeing more manicures throughout the week!


3.28.2013

Malted Easter Eggs

Hey guys!

Easter is coming up this weekend so I thought of creating a mani that was simple and easy to create! A friend actually showed me a similar mani and I thought it was really cute and perfect for Easter so I had to recreate it! Easter is all about candy and pastels so this mani is dedicated to the malted easter eggs candies that I love so much :)


I thought I would throw in a picture of my inspiration!

I used several different polishes to create this mani. My thumb was made with Revlon Colorstay Bonsai. My pointer finger was made using Revlon Top Speed Pink Lingerie. My middle finger was made using Revlon Sunshine Sparkle. My ring finger was made with Wet n Wild Wild Shine Rain Check. And last but not least, my little pinky finger was made with Sally Hansen White. Most of the malted easter egg candies I've had have had brown spots so I decided to go with brown for my mani. The brown specks were made using a small dotting tool and Revlon Totally Toffee. To get the dusty look of the malted eggs, I used Essie Matte About You top coat.


I love love love this mani! I think it's so cute and perfectly Easter! The mani is also very simple and super easy to make. All you really need to do to make this mani is find pastel/Easter colors, add some brown or colored speckles, and top it with a dusty finish! I hope you all liked this mani too and I hope that it gave some you ideas for your nails.  

For another idea, take a look at my last year's Easter mani here!

Happy Easter!

10.11.2012

Confused Leopard

I can't stop using the matte top coat!! I'm pretty sure I'll be using it every couple of months so you all are going to get a lot of designs with me using matte. Here is the latest one.

Leopard matte!! I think this looks absolutely amazing and got tons of compliments from random people.

I started off by applying the gold to all of my nails except the ring finger. Then I put on the black on the ring finger and applied Essie's Matte About You to only the ring finger. Then I went back with an art brush and created the "spots" on all of the nails, including the one matte nail.

I really hope you all love this one as much as I do!! And let me know how it works out if you try it out!

Matte + Flakies

I mentioned before that I love the new matte top coat. I am also in love with flakies!! They are so hard to find in normal stores so when I went to Walgreens and saw that Sally Hansen now has flakies, I had to get a few bottles.
So why not combine my two loves?

 
I used black as my base color and then used Sally Hansen's Diamond Strength Glass Slipper (has bigger flakies). And then topped it off with Essie's Matte About You. Sooo easy to do!

Yay!!

Half Matte

I love matte polish! It looks great and there are so many things you can do with it. I got Essie's Matte About You and wanted to try it out.


I love black so I thought I'd try doing black french nails. I painted the entire nail black and then after it had dried, I used painters tape to block off the tips of the nails. Then I painted over it with the matte top coat.

I guess I didn't let it dry enough because when I peeled off the tape, the edges were sticking up. It still turned out pretty good!

Let me know if you all like it!